Tutorial - Create animation from scratch
In this tutorial you will learn how to draw your own animated GIF images.
To learn creating animation from a set of instant images, click here for other tutorial.
Objective
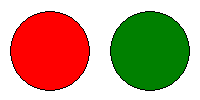
Create animated image like this one:

Step 1 - Start new animation
On the File tab, click Create New Animation. If Animation Wizard appears, click Cancel to close it.
Step 2 - Add new blank frame
- On the Frames tab, click Insert Blank Frame.
You can also use corresponding toolbar button.

- Set frame width and height to 100 and click OK.
Step 3 - Draw red circle
- Set background color to red - click on the lower-right color rectangle to
change current background color.

- Select ellipse tool - click on the ellipse toolbutton.

- Select fill style - use fill style combo box.

- Draw a circle - drag your mouse over the image to draw a circle.
Step 4 - Duplicate frame
On the Frames tab, click Duplicate Frame. You can also use corresponding toolbar button. This will duplicate the frame containing red circle.
Step 5 - Paint the second circle green
- Make sure, the second frame is selected in the frame thumbnails list.
- Set foreground color to green - click on the upper-left color rectangle
to change current foreground color.

- Fill circle with green color - click on the fill toolbutton and then
click directly inside the red circle.

Step 6 - Review results
Your animation is ready. You can click on the Preview tab to view your animation. To save your animation, on the File tab, click Save.